Source
[Article] [Kent C. Dodds] How to add testing to an existing project
Where do you start?
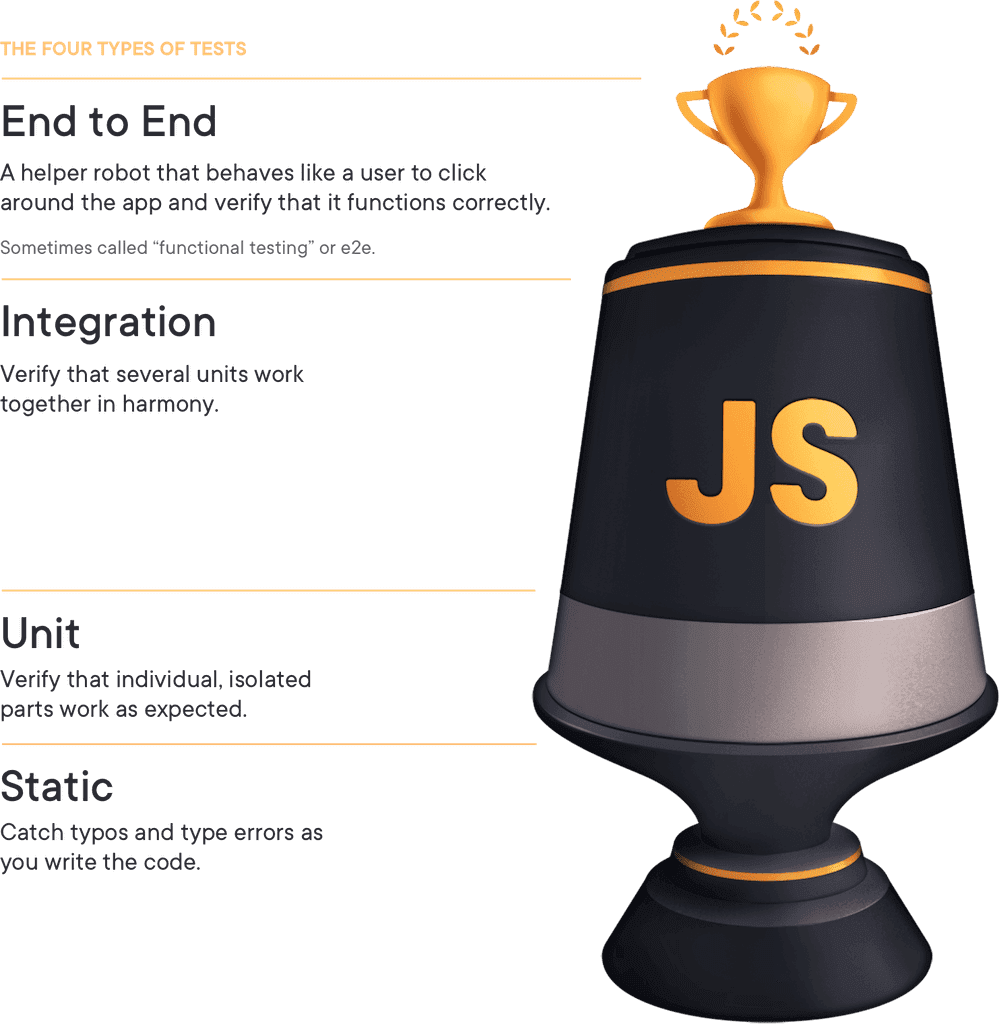
You have tens of thousands, hundreds of thousands, or even millions (😱) of lines of code running in this app. The task feels so huge that you avoid thinking about it. But you have to start somewhere. Let’s zoom out and see how the principles from the Testing Trophy can be applied to your app.
When you’re just starting, you should focus on the things that provide the best return on your investment.
Step 1 - Setup Static Tools
Static testing tools include:
-
Linter: ESLint
-
Formatter: Prettier
-
Type checker: TypeScript/Flow
Setting up ESLint is by far the lowest “cost” thing you can apply to your codebase and can help you avoid an entire category of bugs. It’s also reasonable to incrementally adopt over time because of its configurability. Disable rules that are broken all over your app today, enable others as warnings, and incrementally work on fixing and eliminating problematic code from your app.
Prettier is not difficult to setup, but it often requires a little more convincing for folks who aren’t used to using a code formatter. You can read “Why Prettier?” for more on why it’s so useful. I consider it a static testing tool because if you write your syntax incorrectly, then prettier will re-format it in a way that looks funny which highlights the problem.
TypeScript or Flow is a much harder sell. These tools are incrementally adoptable as well, but they can take a fair amount of work to get configured and working in your build pipeline. Even though these tools are basically “JavaScript with types” that “with types” bit has a very significant learning curve. I can tell you that a static type checker is definitely worth the effort. One piece of advice I would give you is to not worry about getting your types perfect from the start. Don’t be afraid of any (or unknown)! They don’t make your types as useful, but I’ve seen many people give up on TypeScript because they spent so much time banging their head against the wall trying to make their types perfect. Go ahead and leave it as imperfect as it is, then you can come back later when you know more and improve things later.
Step 2 - Make a single E2E test
We’re jumping from the bottom of the testing trophy to the top here. This may take a fair bit of effort, but it will pay off in a HUGE way. There are various ways to go about doing this, but probably the quickest is to write a single E2E test that runs on production (or a production-like environment) and goes through a common/important user flow. This may be a pretty long test. That’s fine (making E2E tests too short is a common testing mistake anyway). But just imagine how helpful it would be if you could hire a manual QA tester that could run through the most important user flow of your app every time you deploy your app to make sure it’s still working. How valuable would that be? HUGE.
This one won’t be easy. Depending on how complex your app, it could take a day or several days to get the test written and running on CI. If you have to set it on a cron job to run every hour or so that’s fine. If you can’t get it running on CI right away that’s fine too. You can iterate to a better situation. Don’t let perfection prevent you from improvement.
Step 3 - Write a single unit test
We’re jumping back to the next type of test. Unit tests are the simplest type of test to write. Pick the simplest single pure function in your app and install/configure all the tools you need to get that simple pure function tested. Once you have that one thing tested, then it will be WAY easier to write additional tests. Many people don’t write tests because all the effort it takes to get tools in place. So your job is to get the tools in place to make it easier to get tests going.
Step 4 - Write more tests
From here, you should have all the tools configured so you can write more tests. You can now focus on more integration tests. With each one you’ll face new challenges and you may need to write some module mocks, but the more you do, the easier future tests become.
You may find it interesting that it isn’t until this step that I suggest you start focusing on integration tests. While they do typically give you the most bang for your buck, they’re often harder to get going until all the tooling is in place first. Also, as valuable as integration tests are, that first comprehensive E2E test is WAY more valuable.
Step 5 - Teach your whole team how to test
Now that your tools are all in place, your team needs to start writing tests for the code they create and maintain. The best way to do this is to convince your manager to buy your whole team (or your CTO to buy the whole company) licenses to TestingJavaScript.com. It is unequivocally the best place to learn how to test JavaScript applications on the internet (very soon to include testing Node.js backends as well).
In fact, on TestingJavaScript.com teaches you how to configure all the tools I mention in this blog post, so I’d recommend that you get your boss to buy you licenses for it before you start working so you can safe yourself the headache of learning how to get them configured and just get work done.